
NOTE: Sara’s blog has moved to a new location: http://saraelizabethcakes.com. Feel free to browse around my tutorials here, then come check out my new site!

These are the things rolling through my head as I assembled this cake. It brought back some wonderful memories of the one cruise I've been on. Snorkeling, too many desserts, card games on the deck, motorcycling on Cozumel wearing the nastiest smelling rental helmet, beyond what you can imagine. I digress: this cake was ordered for my customer's mother's birthday (confusing?) who was also soon to leave on a much anticipated Disney Cruise.
After searching through numerous google and Pinterest images of ocean/cruise/Disney-themed cakes for inspiration, I landed on a favorite by the talented Ashlee at Topsy Turvy:
 |
| http://www.imtopsyturvy.com/nonperil-fondant-birthday-cake-pool-party/ |
Beautiful, right? I love the refreshing, cool, textured simplicity of it. I decided to combine her basic design elements into one cake, adding in a cruise ship and improvising some fireworks (a signature of the Disney cruise experience). I love how it turned out! (Kudos to Ashlee for the original idea and inspiration).
Gumpaste takes a couple days to completely harden, so to begin, what I SHOULD have done was model my cruise ship a few days in advance. Instead, I modeled it the same day that I assembled my cake. It worked, but was still soft while I was taking it on and off the cake, resulting in a little compressing on the sides where I held it. I referred to photos of the actual Disney ship in order to create a very loose translation. I used gumpaste for the main structure, and pre-colored Duff fondant to add the black shell around the hull and the red and black smoke-stacks (another Disney ship signature--if that's what those things are?) The smoke stacks were tricky! I must have squashed those tiny things 10 times each while trying to attach them with Wilton Piping Gel. If I had done them in advance, I could have let them dry before attaching them to the main body, which would have been MUCH easier. So much of good cake decorating has to do with timing! I also used Wilton Edible Markers to imply windows on the boat.

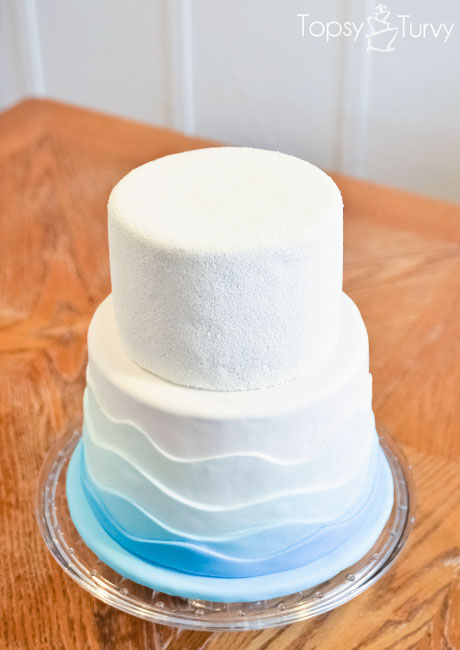
To prepare the cake, I frosted my chilled cakes, then covered them in white fondant--a 50/50 mix of homemade Marshmallow Fondant (MMF) and pre-made Satin Ice Fondant. The Satin ice is a truer white, and is easier to manage, I find. The MMF is inexpensive, readily available, but also a little softer and stickier to work with. The blend worked perfectly.


Originally, I had thought that I would only coat the top with sprinkles, so I stopped there at this point.

Up next: fireworks. I knew these needed a little time to harden, so using red fondant, my Wilton Star-shaped cutter, and some white floral wire, I cut out the stars, applied water to one side as it lay face-down on the counter, laid the wire on it, then brushed another star with water and laid it on top. Fondant/wire cookie, done!

I don't have photos of the next step, as it was more involved--apply the waves is where I crossed my fingers and held my breath that the fondant wouldn't stretch or tear while I worked with the long strips. I colored my fondant by using Marshmallow Fondant, some pre-colored Duff fondant, and some food coloring till I achieved the darkest hue I wanted. Taking two pieces of that color, and then worked in varying quantities of white MMF to achieve my other two desired hues, creating an ombre effect.

I attached them to the fondant-covered cake by applying water lightly to the back of each, building each layer on top of the other, from top to bottom. The top blue layer extends all the way down to the cake board (which, BTW, should be prepared first along with the gumpaste ship to allow it time to harden). I quickly realized the cake would look SO much better if I applied sprinkles to the sides, so I did that the same way as I did the top. Unfortunately, at this point my fondant on my cake had hardened to an extent that the water didn't make it sticky enough--hence the splotchy covering. I also tried the Wilton Piping gel, but they didn't want to stick well to that, either. I wasn't thrilled with it, but the overall effect was still pleasing. I'm still thinking on how to do that better next time! Working faster?
For the grand finale, I used white chocolate (melted) to adhere the ship to the cake, clipped the firework wires to the desired heights, and stuck them into the gumpaste. I know this is self-explanatory based on the photos, but just so there's no room for questions . . .

TaDa!!! One lovely, subtle Disney-ish Cruise Cake on it's way!


No comments:
Post a Comment
I love to hear from you! Leave a comment!